

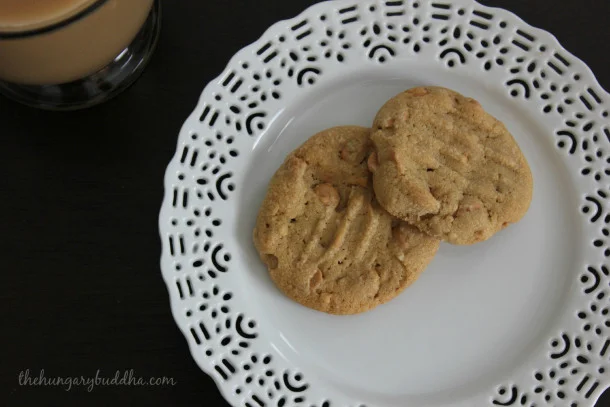
It’s National Peanut Butter Cookie Day! Let’s celebrate and eat cookies!
But first, let’s learn things so we can reward our learning by eating all of those cookies. Let’s start at the very beginning. Peanut butter. God’s food. I’m sorry if you have a peanut allergy, but I guess that just means more peanut butter for me. Silver lining.
Peanut butter was invented by the Aztecs back in the early 1400s, but it wasn’t until Dr. John Harvey Kellogg (yup, that Kellogg) invented a version of peanut butter in 1895 and patented the process for creating peanut butter from raw peanuts that we got something more closely resembling the butter we have today. Though it existed, it wasn’t really a thing here in the U.S. until the early 1900s when Dr. George Washington Carver started to promote the peanut crop as a replacement for the cotton crop which had been destroyed by the boll weevil. Considered by many to be the father of the peanut industry, he developed more than 300 uses for peanuts. His publication, “How to Grow the Peanut and 105 Ways of Preparing it for Human Consumption” advocated peanut butter as a substitute for butter or lard in recipes, and shared three cookie recipes which called for merely crushed nuts, not the puree that we use today. "Modern" peanut butter was officially introduced at the St. Louis World’s fair in 1904.
In 1922, Joseph L. Rosefield began selling a number of brands of peanut butter in California. These peanut butters were churned like butter so they were smoother than the gritty peanut butters of the time. He received the first patent for a shelf-stable peanut butter, which would stay fresh for up to a year because the oil didn't separate from the peanut butter.
Now that we know a little bit about the star ingredient, how did all of this turn into one of our most loved cookies? While cookies containing peanuts in some variety were not uncommon, not until Mrs. Rorer’s New Cook Book, published in 1902, did a recipe actually call for peanut butter. Her recipe instructs shaping the cookies into balls, not as we often times see them today. Today, peanut butter cookies often have a trademark hashtag imprint on the top, and the first time that these fork marks were widely instructed to be placed on the cookie tops was in a recipe from Pillsbury’s Balanced Recipes in 1933, and it was from this time on that peanut butter cookies became popular in kitchens across America.
Now, time for cookies. My mom collected this recipe at the tender age of "before-high school." I’ve heard time and again how Arthur Munch (her childhood best friend) of Buffalo, New York’s mom made the best peanut butter cookies and how even then back in the day, mom thought enough to secure the recipe. Tweaked to be her own, of course, it’s really easy to remember (everything, you’ll see, is in ½ cup increments) and never fails to be a fan favorite.

Makes about 18 cookies
Ingredients
½ cup butter, unsalted
½ cup crunchy peanut butter (preference: JIF)
½ cup granulated sugar
½ cup brown sugar
1 egg, large
1 tsp vanilla
1 tsp baking soda
1 ½ cup flour
1 cup peanut butter chips (preferably Reese’s)
Instructions
Preheat the oven to 350F.
In a stand mixer (or, by hand, if you choose), cream the butter, sugars, and baking soda until light and fluffy, about 5 minutes. Add the peanut butter and beat another 3 or so minutes until fluffy and well incorporated.
Add the egg and vanilla. Mix well. Slowly add the flour and mix until the mixture forms one ball.
Mix in the peanut butter chips. Don’t over beat.
Line a baking sheet with parchment paper. Roll the dough, about 1 TB at a time, into balls and place on the cookie sheet about 2 inches apart (12 cookies per sheet). With a fork, press the dough down to flatten the cookie.

Bake 9-12 minutes until golden brown. Let cool about 3 minutes on the cookie sheet before removing to a wire rack to continue cooling.
Chew on this:
Why the hashtag? No one quite knows, but it serves as a useful distinguishing marker, especially those who may suffer from peanut allergies.
Chrissy Barua lives in Lincoln Park and successfully lawyers by day despite an addiction to bad movies, cookies, and travel. She'll be bringing you monthly doses of delicious as she tries to track down the best grandma recipes she can find. (Follow her on her other cooking adventures at The Hungary Buddha Eats the World.)
Do you have a family-favorite recipe for this cookie tray staple? Send them our way! Comment below or send them our way on any of our social networks. Don't forget to tag @Foodseum and use the hashtag #FeedYourCuriosity for a chance to see your recipe featured.

You may or may not have seen the well-known clip from Alton Brown’s “Good Eats” that has made its rounds on the internet, in which Alton makes what is arguably the world’s most literal grilled cheese. His goal is to make sure that every element of the sandwich is physically kissed by the direct heat of the grill, and he uses MacGyver-level ingenuity to convert spatulas into grill pans. Tossing a few handfuls of cheese into these makeshift pans, he melts the cheese over low heat while the bread browns dutifully on the hotter half of the grill.
Without a doubt, this sandwich looks divine when assembled, but the reaction from the Internet was a resounding, “Sure, it looks good, but why make it so hard on yourself to make something so simple?”
I stand somewhere in-between these two parties; it does seem like if you wanted to make more than the two sandwiches the recipe yields, you either need quite a few spatulas or a good amount of time to spare (the cheese alone can take up of nine minutes to cook). But looking at it on a larger scale, I could not respect Alton more for his refusal to accept that even a recipe as simple and unassuming as a grilled cheese is ever truly perfect.
So this month on The Test, we will turn our eye to this cheesy, golden brown symbol of our childhoods, and attempt to elevate it beyond two pieces of Wonderbread and a rubbery slice of Kraft American cheese. Our goal is to preserve these childhood memories by avoiding overly complicated additions to the process, but still do everything in our power to make it a restaurant-ready recipe that everyone can enjoy.
Cheese, You Make My Heart Melt
I think there are probably a good number of us who hold a deep-rooted love for the processed product we know as American cheese; it’s cheap, holds its shape decently when melted, and has (some) flavor. If you haven’t picked up on it from my flippant descriptions, I’m not the biggest fan of the stuff, but I understand why some people go with it. Real cheese can be very temperamental, and separates if exposed to heat for too long, becoming a leathery mess topped with pools of fat.
To understand how to prevent this, we should take a brief, mildly scientific look at the makeup of cheese. During the cheese making process, an enzyme called rennet is added to milk, which through the wonders of science, breaks down the milk’s proteins in a highly specific way. As the rennet goes to work, we see a separation in the milk occur, resulting in solid milk curds (which you’ve probably had deep fried - SO good) and the watery whey runoff. It’s these solidified curds that make up the body of our cheeses, suspended among droplets of water and fat; unfortunately, this bond is delicate and begins to break down in the presence of heat.

So knowing this, it might make a bit more sense when I tell you that cheese doesn’t truly melt; what we perceive as the melting of those delicious slices of cheese is actually those proteins separating. WE can liken this process somewhat to a rubber band being stretched. Just like that rubber band, cheese has its limit; eventually it will “snap,” and the proteins rapidly clump back together, squeezing out any last bits of moisture and creating those unattractive pools of fat.
With Age Comes Great Flavor
When I was taking my soups class in culinary school, we were running through many of the obligatory restaurant favorites, and eventually hit the classic broccoli cheddar soup. Our natural instinct is to throw every last shred of cheese we have on hand into the pot, but even a soup or sauce stabilized with starch will eventually take on a gritty texture if too much cheese is added.
Our instructor let us in on a little secret - to accentuate the flavors of a young, creamy cheese, like cheddar, you should not load the pot with it, but rather use it in smaller amounts alongside an older cheese, like Parmesan or Roquefort. It’s honestly a magical combination that creates something entirely new; I think of it as bringing a little attitude to the cheeses that haven’t fully matured.
So if we apply this little nugget of knowledge to our grilled cheese sandwich, we get something that doesn’t just taste like dairy; no need to dunk it into tomato soup just to find a bit of real flavor!
Pan Roast Your Way to Success
So looking back, we know that we have to take care with our young melting cheeses, like cheddar and fontina, and that they need to lean on the experience of the more elderly members of the family for flavor. Now, let’s move forward to actually getting this thing made.
In choosing the bread for your sandwich, the world is your oyster. Want to break out the Wonderbread? Cool. Personally, I think the bread should be just as important as the cheese, so something with good flavor like an aged sourdough or a delectable pretzel roll are natural go-tos. But remember, this isn’t fine dining; whatever you may have lying around is fine, as long as you treat it right.

For maximum buttery crunch and flavor, I always toast the bread on one side before assembling my sandwich. The cheese (and whatever other ingredients wander into the mix) will go on the cooked side of the bread, so all we have to do is toast the outside and melt the cheese. Where we run into trouble is ensuring the bread hasn’t toasted to a charcoal black by the time our ingredients are heated through.
To this, I propose a solution rooted in one of the most fundamental techniques of restaurant cooking: the pan roast. When a chef has a protein that is particularly thick, it’s obvious to them that if they cook it entirely on the direct heat of the gas range, it will be completely blackened by the time it has cooked to temperature internally. So instead, the meat is seared on one side on the stove top, flipped, and transferred (pan and all) to the ambient heat of the oven, where it can be gradually cooked without drying out or burning the surface.

Equip yourself with a heavy-bottomed pan that can take the heat of the oven, and do as the great restaurant chefs do. Assemble the grilled cheese. Toast it to golden brown on one side, flip, and throw the whole kit and caboodle into the heat of your oven. Watch attentively, making sure to wipe off the inevitable drool from your face, and before you know it, the perfect grilled cheese will emerge.
With food culture spreading like wild fire across every facet of today’s society, I think it’s great that there is a rapidly growing appreciation and recognition of the food that we may have otherwise taken for granted. Even your average home chefs are finding themselves motivated to push their cooking into the realm of art that can be ooh-ed and aah-ed over by friends. Sometimes, however, in this push to elevate our craft, the simple comfort foods we loved growing up fall by the wayside. Never forget about the simple pleasures in life, and don’t be afraid to turn back to what you know for inspiration; sometimes it’s the humblest dishes that impress the most.
THE ULTIMATE GRILLED CHEESE
Makes 2 Sandwiches

4 slices thick-cut, good-quality bread
4 tablespoons unsalted butter, divided
4 slices cheddar cheese, or other melting cheese (Havarti, fontina, etc.)
¼ cup aged Parmesan cheese or other mature cheese (Pecorino, Parmigiano-Reggiano, etc.), grated
1. Preheat the oven to 350 degrees.
2. Place a large heavy-bottomed sauté pan over medium heat, and add two tablespoons butter to the pan. When the butter stops foaming, add the slices of bread and toast until golden brown on one side (cook in batches if the pan isn’t big enough).
3. Turn off the heat, and remove the slices of bread from the pan. Transfer to a cutting board. Place a slice of cheddar cheese and a bit of Parmesan on the toasted side of each slice of bread, then sandwich the bread together.
4. Return the pan to medium heat, and add the remaining butter. Place the two sandwiches into the pan, and allow to toast to a golden brown on one side. Turn off the heat, flip the sandwiches, and transfer to the oven.
5. Cook the sandwiches in the oven until the cheese melts and the bread is golden brown on the remaining side, about 3-5 minutes. Remove from the oven, cut the sandwiches in half, and serve immediately.

Originally from Columbia, South Carolina, Milo Klos is relatively new to Chicago, but is already looking to leave his mark on the city's food culture, eating as much as possible along the way. He received both his bachelor's degree in creative writing and culinary certification from the University of South Carolina, and spent a couple of years teaching cooking classes in the SC-based Charleston Cooks classroom kitchen before making his move to Chicagoland. Here in the city, he works as a private culinary instructor as well as helping to teach cooking classes downtown at Sur La Table. Any bit of free time is usually spent styling food for his Instagram account (@chefagrams), or immersing himself in anything even remotely Batman related.
What is your most perfect grilled cheese? Comment below or send us your ooey, gooey grilled cheese pics on any of our social networks. Don't forget to tag @Foodseum and use the hashtag #FeedYourCuriosity
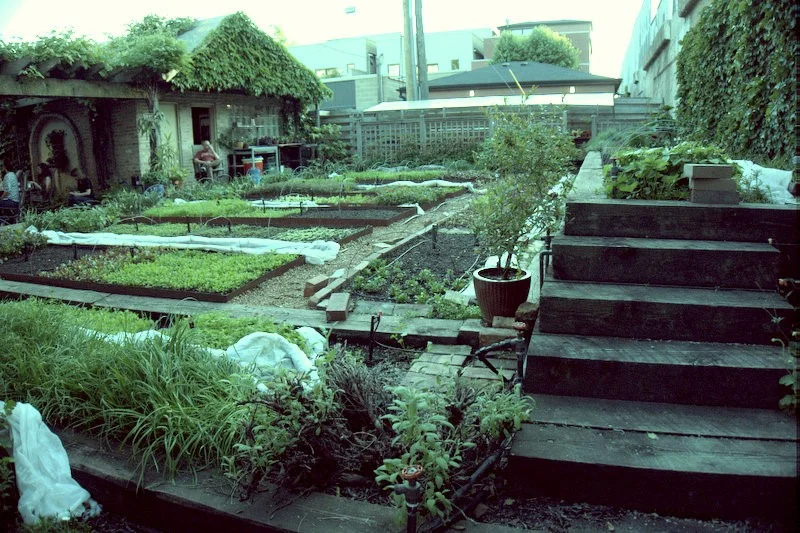
We are in the midst of spring, the time where gardens are blooming and menus change from the heavier, winter stews to lighter fare. Many restaurants begin to take a farm-to-table approach, sourcing their food from local farms and continuing their sustainability efforts. One Chicago legend is taking this approach to the next level with a garden in his own backyard. From his restaurants on Clark Street to his line of salsas at the grocery store, Rick Bayless’ name has become synonymous with delicious, fresh Mexican food. When I was able to attend the Bayless Organic Garden Tour, I knew I was going to witness food innovation at its finest, but I didn't know I would leave with inspiration for my own home garden.

As I entered through the wood-paneled doors, I entered into a garden oasis. My head was turning from side to side, up and down; every inch of the garden was used purposefully and beautifully. There I stood in Rick Bayless’ garden that spanned three Chicago city lots as the tour began. The tour was led by Bill Shores, a professional gardener who has worked with Rick Bayless for ten years and has had a career growing food for chefs for 18 years. He explained that we were standing in a small-space ornamental and urban planning garden. Everything from the raised beds, patio boxes, and potted plants all served a purpose in the garden and there was no inch of land that was wasted. This was a garden where the chefs could collaborate openly with the gardener and interact with the crops. Many of the plants in this backyard garden actually are harvested and sent to Rick Bayless’ restaurants less than four miles away! Talk about locally produced.

Bill Shores is brimming with knowledge and dedication to this detailed garden. Here are a few of the biggest takeaways I learned about gardening from one of the best in the business:
1. Many of the plants lining the raised beds are succession crops. These crops are also known as quick-growing crops. Once harvested it can take as little as four weeks for another harvest; examples include spinach and leafy greens.
2. The question was raised, how do you avoid squirrels, birds, and rabbits from entering the garden? The Bayless Organic Farm partners with a Chicago working cat program. There are two cats that roam around the garden area (I didn’t spot them when I was there). Ever since the cats arrived, a rabbit has not been seen in the garden in 2 years. Thus, to keep the rabbits away from your garden, consider a cat.
3. Potted plants are great as decoration, but also can be used as a waiting area until space in the garden is available at the right time of the season.

4. You do not need a lot of space to start your own garden. You can plant in pots or begin with a small garden space and try vertical gardening.
5. Enjoy the fruits of your labor and be proud! The freshness you get from growing your own crops is unlike anything you will eat. Although you have to be patient in the beginning of the season, the outcome is well worth the wait.
You can learn more about the Bayless Garden Tour and about Bill Shores on their website. They even have their own blog filled with gardening knowledge and tips and tricks to get you through the unpredictable Chicago weather. Go ahead and start developing your green thumb and have fun!


You can find Jessica Ang in the kitchen experimenting with a new ingredient, replicating a recipe, or eating the last cookie in the jar. Much of her love for cooking comes from her curiosity to explore different cultures. Being able to share what she learns through cooking, tasting, and traveling is what keeps her palate adventurous. Also an avid runner, Jessica loves being outdoors and can be seen running through her neighborhood day or night. She always appreciates a good patio for dinner and drinks and is willing to bake birthday cakes for anyone.
Do you have any urban gardening tips or tricks? We would love to hear them! Post a comment below or send them our way on any of our social networks. Don't forget to tag @Foodseum and use the hashtag #FeedYourCuriosity
by Alexandria Ross
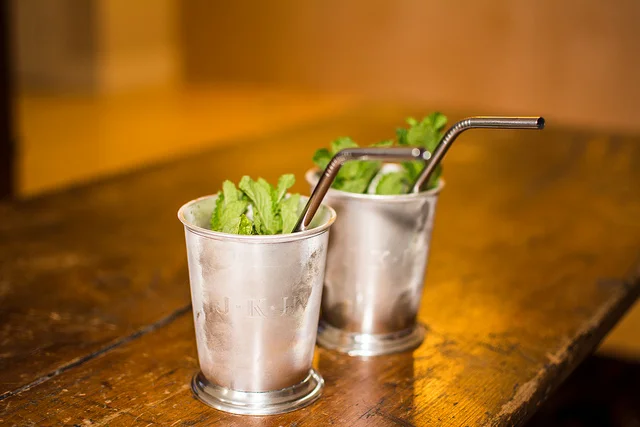
Growing up in Wisconsin allowed little to no exposure to the mint julep. While the bourbon culture is prominent in that region, it wasn’t until a few years ago that I had my first taste of that centuries-old Southern cocktail so celebrated during the Kentucky Derby and across the United States on National Mint Julep Day (May 30).
While we certainly know that the julep’s origins are rooted in the South, it’s specific inventor(s) have never been brought to light. Mentions of the mint julep appear in literature as early as 1784, where it was cited as a remedy for nausea…which may seem surprising, until we look at its name. “Julep” has Persian roots meaning “rose water,” which, hundreds of years ago, was a popular form of medication. The mint leaf’s healing properties are no secret, and the muddling process included in crafting the julep helps release even more of the plant’s essential oils and enhances the flavor.
Kentucky Senator Henry Clay had a significant role in spreading the sweet, boozy creation across U.S. soil, bringing the mint julep to the Round Robin Bar at the famous Willard Hotel in Washington, DC. The drink gained even more attention when Frederick Marryat, a British captain, praised it in his 1840 book "Second Series of A Diary in America."
Up until the 19th century, the recipe had pretty much adhered to the same four ingredients: mint (usually spearmint), sugar, bourbon, and ice. However, during this time, people began opting for genever, an aged gin, in place of bourbon in their mint juleps. Jerry Thomas loaned even more variations to the recipe in the 1862 edition of "Bar-Tenders Guide: How to Mix Drinks" or The "Bon-Viviant’s Companion." Cognac, brandy, whiskey, and sparkling Moselle, a primarily white wine, found their place alongside the customary bourbon and gin formulas. Despite the range of recipe options, every mint julep was served in a silver or pewter cup to create a frosty surface.
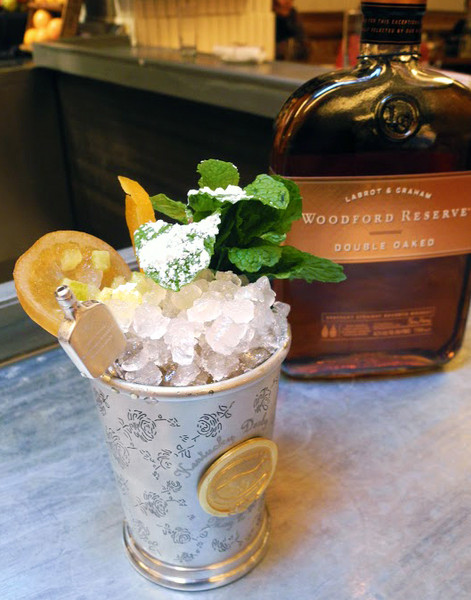
In 1938, Churchill Downs and the Kentucky Derby began promoting the mint julep as the designated drink of the event. While the cocktail uses Early Times as its spirit, the official bourbon of the Derby happens to be Woodford Reserve, a 90.4-proof liquor made in Versailles, Kentucky. The race began offering extra premium mint juleps in 2006, composed of the following: imported Irish mint, Australian sugar, ice cubes made from Bavarian Alps spring water, and Woodford Reserve, served in gold plated cups. At $1,000 per drink, the proceeds go to various charitable causes.
I’ve found hands-on learning is the best for me, so the last part of my mint julep education was to take one for the team and make one of my own. Maintaining the original components, but adding a little taste of my own, I put a summery twist on the drink by adding some strawberry into the muddling process. I also used simple syrup in place of just sugar and added mint to the mixture during the heating process. After about an hour of sticky experimenting, I finalized the recipe. Enjoy!
Strawberry Mint Julep

1 cup ice
1 cup sugar
1 cup loosely packed + a few extra mint leaves
2 strawberries
1/2 cup ice
2 shots bourbon
1. Heat the water, sugar, and 1 C mint leaves on medium high until boiling for 1-2 minutes. Strain into a container and cool in refrigerator for about an hour.
2. Slice one strawberry and add to glass with 2 mint leaves. Muddle until they’re mashed to your liking.
3. Add ice, 1/4 minted syrup, and bourbon. Mix well.
4. Garnish with the rest of the mint leaves and second strawberry.